Pages

Showing posts with label DIY. Show all posts

Tuesday, December 6, 2011

Day 155: With a Lil Help From Ikea

Sunday, Josh and I took a little adventure to a magical wonderland called IKEA. I was in absolute awe. I mean I've seen it in movies but nothing could have prepared me for the awesomeness that is IKEA. I think we spent about 2 hours or so there (luckily there was a tv playing football in one of the corners surrounded by about 20 happy gentlemen patiently awaiting their wives/girlfriends return where Josh had to spend a few minutes) But for the most part he thought it was pretty terrific too.

The reason for the trip: to acquire some cheap legs/sawhorse like things. I've been wanting to get a kitchen table for quite some time now, I've been searching Craigslist, Wally's, Target, thrift stores, but have not found anything of interest :(  I remember being in Anthropologie a month ago and they had a table made out of an old door (price tag $2,559....yeah its an old door people!) So in my usual fashion I said, "hey! I can make that!" I just happened to be searching the creepy murder basement of my house today and found....yep, an old door! BINGO! So I googled: "how to make a table from an old door" and I found:

http://www.designsponge.com/2008/01/diy-project-dining-table.html
And here is my take: 
The door was already painted this way! Bonus!


Ikea sawhorse lookin' thingies: $10 each (spent $20 total)
I guess if I wanted to get fancy (like the design sponge table) I would have to cover it in some sort of glass or polyurethane...but I think I'm gonna just leave it rustic...get some cute placemats...over all I am super pumped with how it turned out!

Happy Tuesday everyone...hope i keep this blogging thing going! I'm trying!

Monday, December 5, 2011

Day 154: Christmas Crafty

Its been snowing profusely here in Denver...and not much in the mountains which makes me a very sad snowboarder. However, being stuck in the house all weekend has given me much needed crafty-crafty time!
Each year for Christmas (because of my dwindling bank account and my general desire for arts and crafts time) I make my family something cute. This year: Lightbulb snowmen ornaments.
Here's where I got the inspiration: Lightbulb snowman ornament

And here is my take:


Pretty cute, huh? The only socks I could bear to part with were these polka dot ones (sadly they have a hole in the heel) Where are all those random socks when I need them?! I swear I couldn't find any lying around!

I also made this, um well, decoration of sorts...but it looks like a third grader did it...not my finest work.
And then I also made this star for my very own Christmas tree!
It says "I wish I may, I wish I might"
The good news is I had ALL of the materials for today's crafty-crafty session lying around the house. So money spent on all of these goodies=zilch, zero, nada.

Wednesday, October 26, 2011

Day 147: DIY Halloween Decoration

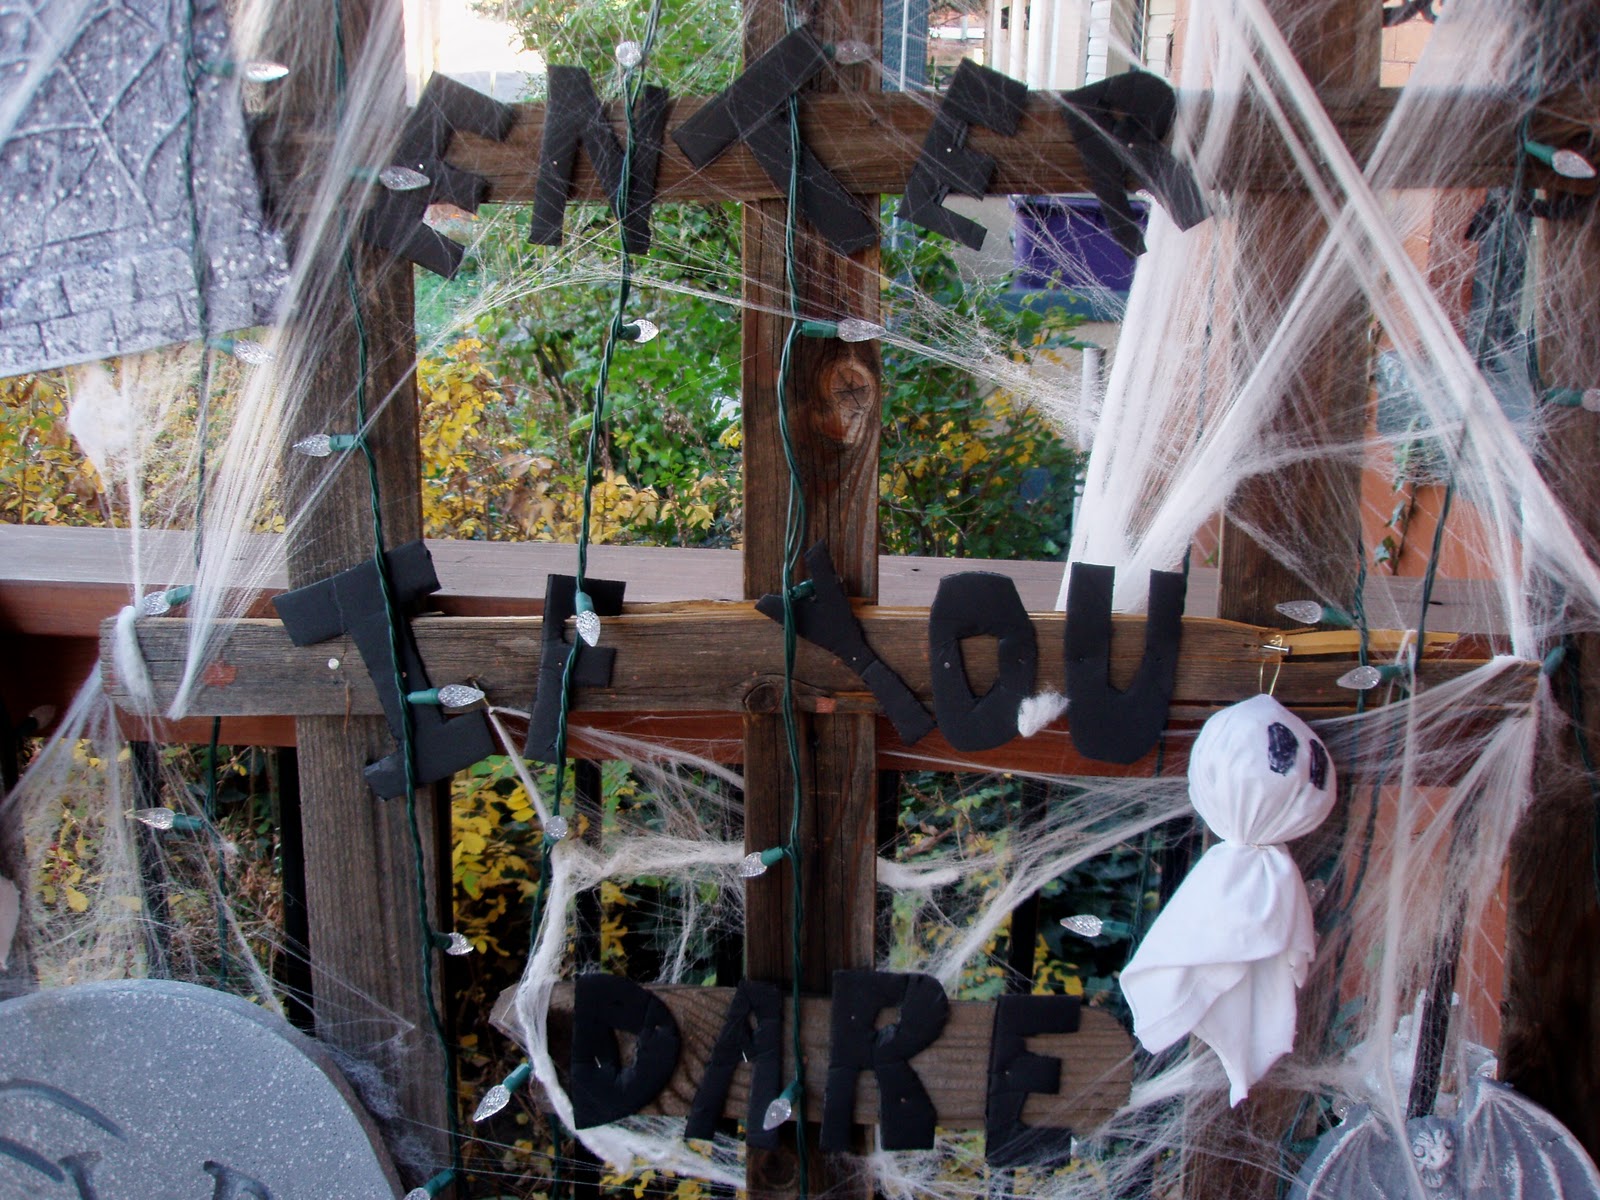
At this point there is one thing I do know: I have a lot of time on my hands! My friend Yuki is having a massive Halloween party this Saturday and it started innocently enough, "I want to make her a Halloween sign!" That somehow morphed into this monstrosity:


If you can't quite make it out it says "Enter if You Dare"

What you will need for Halloween Monstrosity of a Sign:
  • Fence Posts (the older the better)
  •  Hammer and Nails
  • Christmas Lights
  • Fake Spider Web Stuff
  • Black Posterboard (cut out whatever letters you would like your sign to say)
  • Various Foam tombstones (got mine at the dollar store)
  • White Tshirt and Magic Marker (for ghosts)
Then you sort of just assemble it all together (Sorry I didn't do a picture step by step, I sort of felt a creative vibe and couldn't stop to take pictures) 

Happy Halloween Everybody!!

Monday, July 18, 2011

Day 104: Make Something Monday

I started making this scarf, oh 4 months ago, after seeing this:
 And decided that I needed to put the final touches on it after browsing around Threadsence:
Unfortunately, the guy deleted this tutorial before I got a chance to see it. So, as I do with most things in life, I winged it.

And this is what I came up with:

sorry about the "out of focus" pic here, for some reason I cannot take photos of my own chest! I tried 12 times then my battery died, I swear, 12 times!

I would do a DIY tutorial on this but to be quite honest it is just way to hard to explain. 
Sandals: Old Navy $6, Shorts: Old Navy $2.97, Tank: Target (maternity haha) $4, Necklace/Scarf: made by moi

I dunno, this scarf might be a little crazy hippie lady, even for me...what do you think?

Thursday, July 7, 2011

Day 98: I See It, I Make it

I have this thing I do, I see a necklace in a magazine, and decide instead of the hefty $45 price tag, plus shipping, I think, "I could make that!" I'm sure Swell magazine doesn't like this much, but hey, I'm on a budget!

Shoes: Wal-Mart $15, Skirt: Target umm $15 or $20ish, Tank: Fossil $6, Necklace made by moi
Here's the magazine's version...
And here's my version. Pret-tea darn similar if you ask me..

And then I pranced around for a bit in my happy white skirt.

You can also wear it long, like this...
I tried a Carrie Bradshaw bun...it needs a little work.

Saturday, April 16, 2011

Day 48: DIY Wall Decor

Step 1: Go to Goodwill , find cheap picture frames (10-15 depending on the size of your wall) in all colors, sizes, etc. ( I got mine for $1 each..)

Step 2: Grab your tools: Hammer, panel nails, tape, scissors

 Step 3: Pick your photos. I went with a landscape/travel theme, or they can be completely random, whatever you blows your skirt up.


Step 4: Cut backdrops out of construction paper for the 5x7 frames (or be super pimp and just print your pictures this size beforehand)...if you have fancier paper, use it. I do not so construction paper it is.
Step 5: Start randomly placing picture frames on your wall, you could get all fancy and get out a ruler and a leveler, but that's no fun really. I did have one focal point, my favorite picture of myself, a black and white picture of me looking forward out the window, it symbolizes me looking out at all the cool places I've been and how many more I want to see.
Step 6: Include these cute lil guys (or something similar just so its not all pictures, they were $1 each)
Then marvel at what you've created:


What I like about this is you can keep adding pictures until your heart's content. I definitely want about 5 more photos and a couple more cute lil guys.

Total time spent: 1 hour
Total cash spent: $12

Oh yeah and um here's what I wore out last night: I liked it so I thought I'd share, snagged this shirt for $1.
Boots: Charming Charlies $10, Skinnies: Wal-Mart $10, Belt: Fossil (christmas gift from eons ago), Shirt: Wal-Mart $1, Jacket: Macy's$15, Necklace: Fossil 9Gift from momma)

Tuesday, April 12, 2011

Day 44: DIY: Perfect Summer Salad

Did anyone notice I gave my blog a face lift? I thought the patchwork was adorable....think it might be a little busy..but hey, I'm busy too.
So after Sunday's "Bottomless Mimosa Debacle" as I'm calling it, I decided I needed to eat well and exercise for the next couple of days. My tummy was NOT a happy camper, I will spare you the details. My problem is that  I eat these little healthy lunches, feel great for a few hours, then on the 5pm drive home I feel like Cindy "LAY OFF ME I'M STARVING!!
Or maybe a bit like Natalie Portman in Black Swan:
So today I was on the ultimate quest for a salad that kept me full. I came up with this:

The PERFECT 7 INGREDIENT SUMMER SALAD

What you need:
I added the mushrooms later, good call!!


I enjoyed it out on the patio....I heart my new table.
Disclaimer: After further review this salad failed to keep my belly full and I still turned into the cookie monster around 4pm. Lesson learned needed protein: Add chicken. Let it be called THE PERFECT 8 INGREDIENT SUMMER SALAD